{These are the pics I got when I asked him to show me his wallet. These were the best ones. He kept hiding it! Silly bill !}
This project is for my oldest son [who just turned 3]. He is all about collecting money but would like to hold it somewhere else other than his piggie bank. He loves daddy's wallet and I find him walking around with it in his pocket a lot. Hopefully with a wallet of his own he'll leave ours alone. Well, maybe. I asked him what he wanted on his wallet.... trains! cars! dump truck! animals! zoo! the wall! alligator! and the list goes on and on. What he {finally} chose was trains. I also let him choose the color of the fabric. He chose red. Which was totally weird since that was what I was thinking of using too! The only red fabric I have at the house is felt ... and satin. Felt is kid-friendly but oh so thick! So satin it is! This kid is going to have one heck-of-a-fancy wallet!
Materials needed:
*Fabric for lining [ enough for 2 rectangles - 4'' X 8.5'' each]
*Fabric for outer ''cover'' [ enough for 1 rectangle - 8.5'' X 10.5'' ]
*Paint
*Any other embellishments you'd like to use.
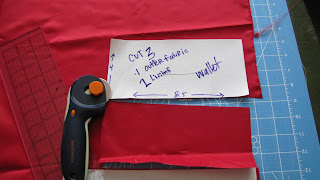
First I made a template for my 2 rectangles. Since I am going to make lots of wallets, I thought it would be nice to have a template on-hand.


Don't forget to send me YOUR finished wallets! And please ... I need feedback on how this was written! What did you like best? What can I improve on?

Cut 1 {4'' X 8.5''} piece from your outer fabric. Mine is DENIM. I chose to use jeans because I love them! And I also have a TON of left overs......donated jeans from family and friends from when I was making a jean quilt. Jeans are also very durable, especially for a wallet for kids. I love how you can dress it up for a girl or grunge it for a boy.

ONE PANT LEG MAKES 10 WALLETS!! Since I was cutting one, I thought I'd cut up the whole leg. Now I have extras cut and ready for me to make more! [I think I might end up making those this week!]

Cut 1 large {8.5'' X 10.5''} rectangle. When working this pattern you will have about 1/2'' extra fabric to work with. I did this so you [ok mostly me] have a margin of error [sometimes the fabric slips etc. I like to always have a bit extra. If you don't like this, only measure 10''.]

Cut 2 lining pieces. 4'' X 8.5'' rectangle

Here are all the pieces. 2 lining, 1 outer and 1 large piece for the pockets.
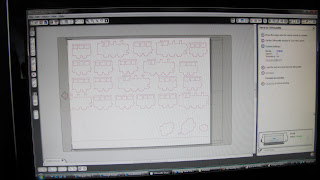
{I apologize a head of time for the following pics.... I have no clue how to take a snapshot of my computer screen, except to just take a pic with my camera. Maybe I'll be cool enough someday to figure it out.}

I wanted to have a printed fabric but didn't want to go out and buy any. I've promised the hubby that I would only buy something for a project if I ABSOLUTELY NEEDED TO. And this wasn't a necessity. Good thing for me that I have a Silhouette Digital Die cutter! I JUST LOVE IT!!! I used to print things from the computer then cut them out and transfer or paint. Now I don't need to do that. So worth the investment!

I looked through my library and my son picked out the train he liked best.

Double click on image and it will be sent to a new document.

I separated the grouping and moved them around and adjusted the size to what I wanted. To see a full tutorial on how to use the Silhouette, visit their blog at: http://blog.silhouetteamerica.com/

Final draft before sending it to the cutter.
And ... CUT! I used freezer paper as my template paper because you can iron it onto your fabric and it stays while you play!

Waiting for it to finish cutting.

While the images are being cut out ... iron all fabric pieces.

Sew {with right sides together} the outer fabric [denim] and 1 piece of lining [red satin]. SEW ACROSS THE TOP ONLY!

Iron open.

Fold wrong sides together and iron.

Top stitch 1/8'' seam across TOP.

Sew 1/8'' all around to keep the lining from shifting. This helps it to stay put. I hate seem-ripping so this really helps with my sanity!

Here are all the trains all cut out. Silhouette= time saver!

Cut the images into strips and iron SHINNY SIDE DOWN onto fabric, using med-high heat NO STEAM!

Putting on the windows ... a little time-consuming but well worth it for me. If you don't have the time or patience for this, try using the cut out. It will give you a negative space, but is a time saver :) I used my QuicKutz Quick Stick ... the sticky end to help grab and hold those teeny tiny windows.

All finished! Well, with the ironing on, at least!

Paint. I used stippling in each image to give an uneven feel to it, add some texture.
Set aside to dry. Took about an hour to dry completely. I set it outside in the sun.

Once the paint is dry, peel off the freezer paper. I used the acrylic end of my QuicKutz Quick Stick. There is a pointed edge and a flat edge. I used the flat to slide under the paper and the pointed end to finish cleaning up the fabric.

This is what it looks like all painted and paper cleaned off. I love making my own printed fabric!
{oh, and yes, I realize that not all the windows are out of the train ... I saw that well after I had taken this pic and numerous other ones! LOL}

Mark. Fold and iron in the following increments:
{measuring from top and working down to the bottom}
3''
1.5''
2''
1.5''
2''
I marked a little over each measurement to compensate for the folds. ie- instead of right on the 3'' I marked 3 1/16''.

Measure where the center of the wallet will be. Mark with tailors chalk or wash-able pen.

Sew down the middle. If you would like to have a snugger fit for the cards, sew a 1/8'' line on either side of the middle line. {see picture below} THE CARDS WILL BE VERY VERY SNUG IF YOU DO 3 LINES. I like it both ways.

Top stitch 1/8'' across the top. Sew 1/8'' around all sides, this is just to hold the fabric in place. I hate to seem-rip and satin slides all over the place. This helps me keep my project going quickly and smoothly.

With outside cover [denim] facing inside pockets sew a 1/2'' seam down one side, across the bottom and up the other side.

It should look like so!

Trim corners.

Clip threads. Trim excess fabric from sides and bottom. I trimmed about 1/8'' and 1/4'' from the seam line.

Turn right-side out.

Iron as flat as you can :) With denim it is difficult to get it completely flat, but this step is worth it.

Top stitch 1/8" around both sides and bottom. [don't stitch your top closed!]

This was a little bit of an after-thought ... my logo/tag. So instead of sewing on my tag like I normally do [ok ... so like I SHOULD HAVE done ... I used an iron-on transfer to act as my tag :) It's less likely to get pulled off by my son so I think it is a good way to go]

Iron on the freezer paper to the outside of the wallet, making sure to get all edges so paint doesn't seep.

Apply paint liberally. I used a swirling and stippling motion to get a grungy effect. Set aside to dry for about 30 mins to a few hours, depending on how much paint you applied. If you would like it darker ... do another coat or two.

When dry, peel off freezer paper.

Finished!
Don't forget to send me YOUR finished wallets! And please ... I need feedback on how this was written! What did you like best? What can I improve on?